

If your analytics don’t line up with what’s actually happening in your pipeline, start here.
Because the truth is, most attribution problems don’t start with models or dashboards.
They start with messy and inconsistent UTM tags.
Let’s fix that!
So what are UTM Tags?
UTM stands for Urchin Tracking Module (Google bought a company called Urchin back in 2005).
They’re the tiny URL parameters you tack onto the end of a link so analytics tools know where a click came from.
For example, you’ll find several of these in the url below:
https://upside.tech/?utm_source=linkedin&utm_medium=paid_social&utm_campaign=demo_push&utm_content=carousel1
When someone clicks that link, Google Analytics (or any analytics platform) reads each of those bits and says, “This visit originated from LinkedIn, through a paid social ad, for the Demo Push campaign, using the Carousel 1 creative.”
Simple, but also fragile.
What Each Parameter Means
Here’s the quick cheat sheet:
Note: Some analytics systems treat the first three (source / medium / campaign) as required for proper attribution.
Consistency matters here… “LinkedIn” is not the same as “linkedin”. Capitalization, spacing, or varying underscores can fragment your reporting.
How to Make Sure You Use Them Correctly
How to use UTM tags correctly
1. Define a standard set
Create one authoritative list of approved values and share it with the broader marketing team to use as a resource. Think of it like a brand style guide for your data.
Decide upfront how to name platforms (e.g. linkedin not LI), how to label mediums (paid_social not social_paid), and how to format campaigns (product_launch_q1). Picklists are your friend here!
Periodically review the actual values to ensure everyone is using standard values.
2. Use a generator
A common best-practice: build a shared spreadsheet or internal tool where each UTM field is selected from a dropdown/picklist. Then a simple `CONCATENATE` formula produces the full tagged URL.
Benefits: fewer typos, consistent naming, easier grouping in reports.
Pro tip- if you’re excel-savvy, add some IF’s to make sure that a link will NOT be generated until all four inputs have been provided: the destination, source, medium, and campaign.
3. Automate when possible
If you run ads, enable auto-tagging features where available (for example in Google Ads). This reduces manual work and improves consistency.
But! make sure your manual tagging conventions do not conflict with platform-generated tags.
Getting Google Analytics to Read Them Correctly
GA4 assigns traffic into “channel” buckets based on source/medium values and internal rules. If a combination doesn’t match known rules, it may land in the Unassigned bucket.
In GA4 you can create custom channel groups (via Admin → Data Settings → Channel Groups) to map your custom fields into broader buckets.
Example:
If you use utm_medium=paid_social, tell GA4 that “paid_social” belongs under the “Paid Social” channel group. Otherwise, all your hard-earned ad clicks will, sadly, sit in an “Unassigned” channel bucket. For reference, here’s Google’s help documentation on how to set this up in your instance.
Turning UTM Values Into Actual Reporting Data
Once you’ve tagged everything consistently, what do you do with those values?
Option 1: Capture UTMs in Your Marketing Automation System
Capture UTM parameters when someone submits a form by writing them into custom fields on lead/contact records.
Pros:
- Easy to set up, either powered by triggers/workflows or hidden fields on your forms that read from url parameters or cookie values.
- Easily tie that data into existing reporting including lead, contact, and opportunity reports.
Cons:
- Usually you are only able to capture only first or last touch, not the full touch-history.
- The lead/contact record holding the UTM may not be the same one that sales chooses to convert, leaving it up to chance.
- Without write-protection logic, values can be overwritten, making it hard to audit the data for quality and accuracy.
Option 2: Proactive touchpoint tracking
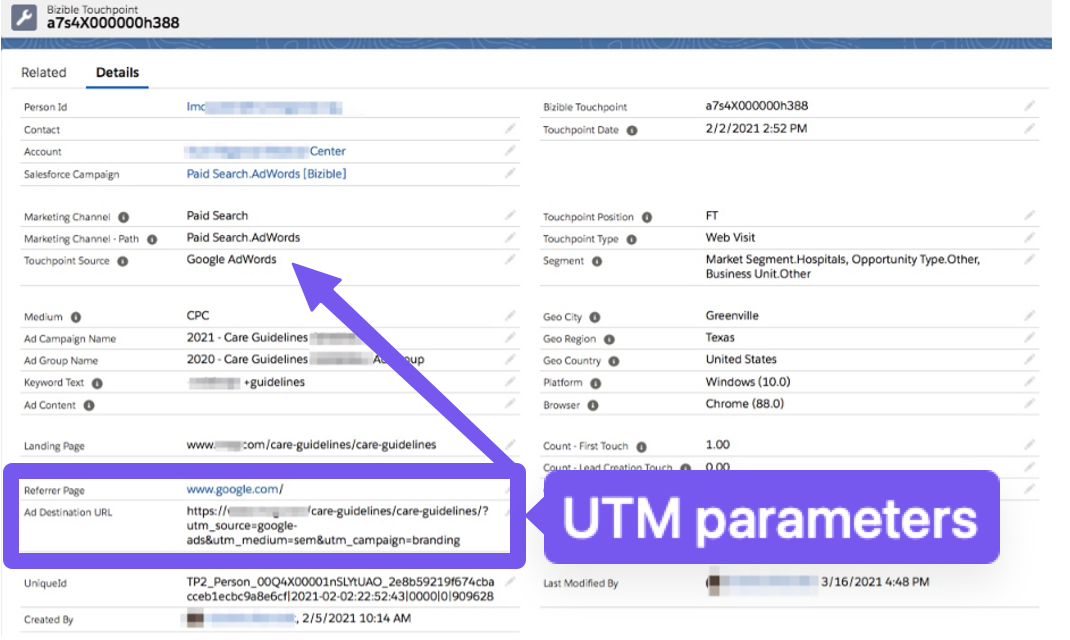
There are platforms such as Marketo Measure (formerly Bizible) that will log every web visit or click into a persistent model (visit‐level or session‐level data). This way, you can capture all UTM parameters associated with every touchpoint.
Pros:
- Individual records for every tagged click
- Better data for multi-touch attribution
Cons:
- Requires setup of scripts/pixels
- Retrofitting older data may not be feasible
Option 3: Full-journey tracking (recommended)
If your organization is using a marketing automation platform such as Marketo or HubSpot, you’re already logging web visit data, and you can leverage all that data for attribution. Forensic Attribution Systems like Upside can extract the existing data and build reporting off of the historical values.
Pros:
- More accurate influence reporting on pipeline and revenue
- Leverages historical data without needing to recapture visits
Cons:
- Data completeness depends on use of UTM parameters historically
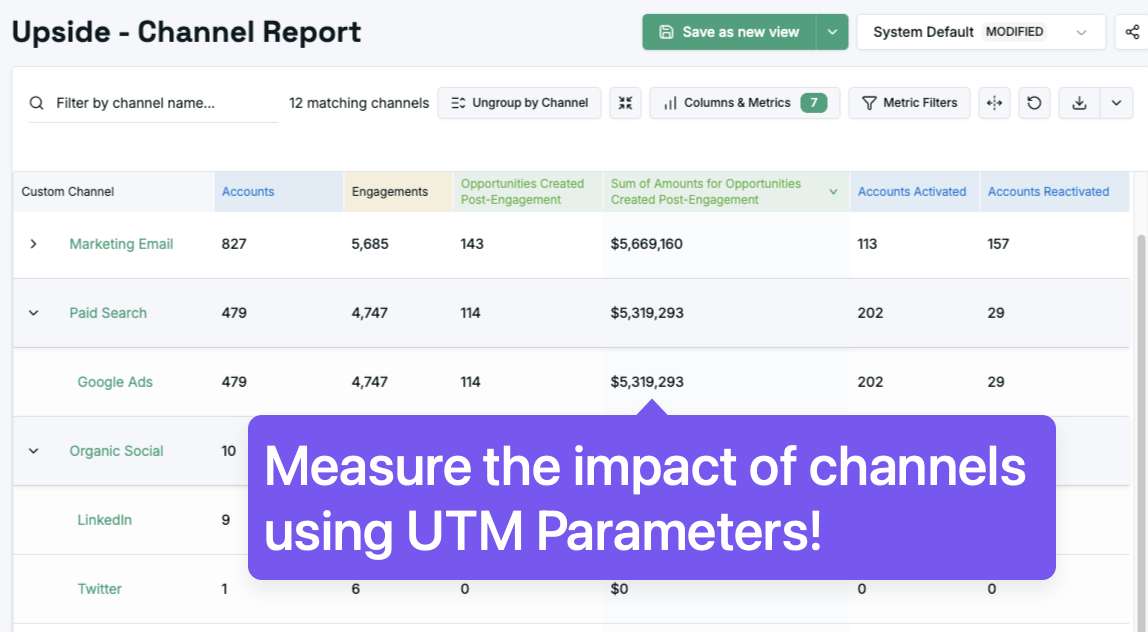
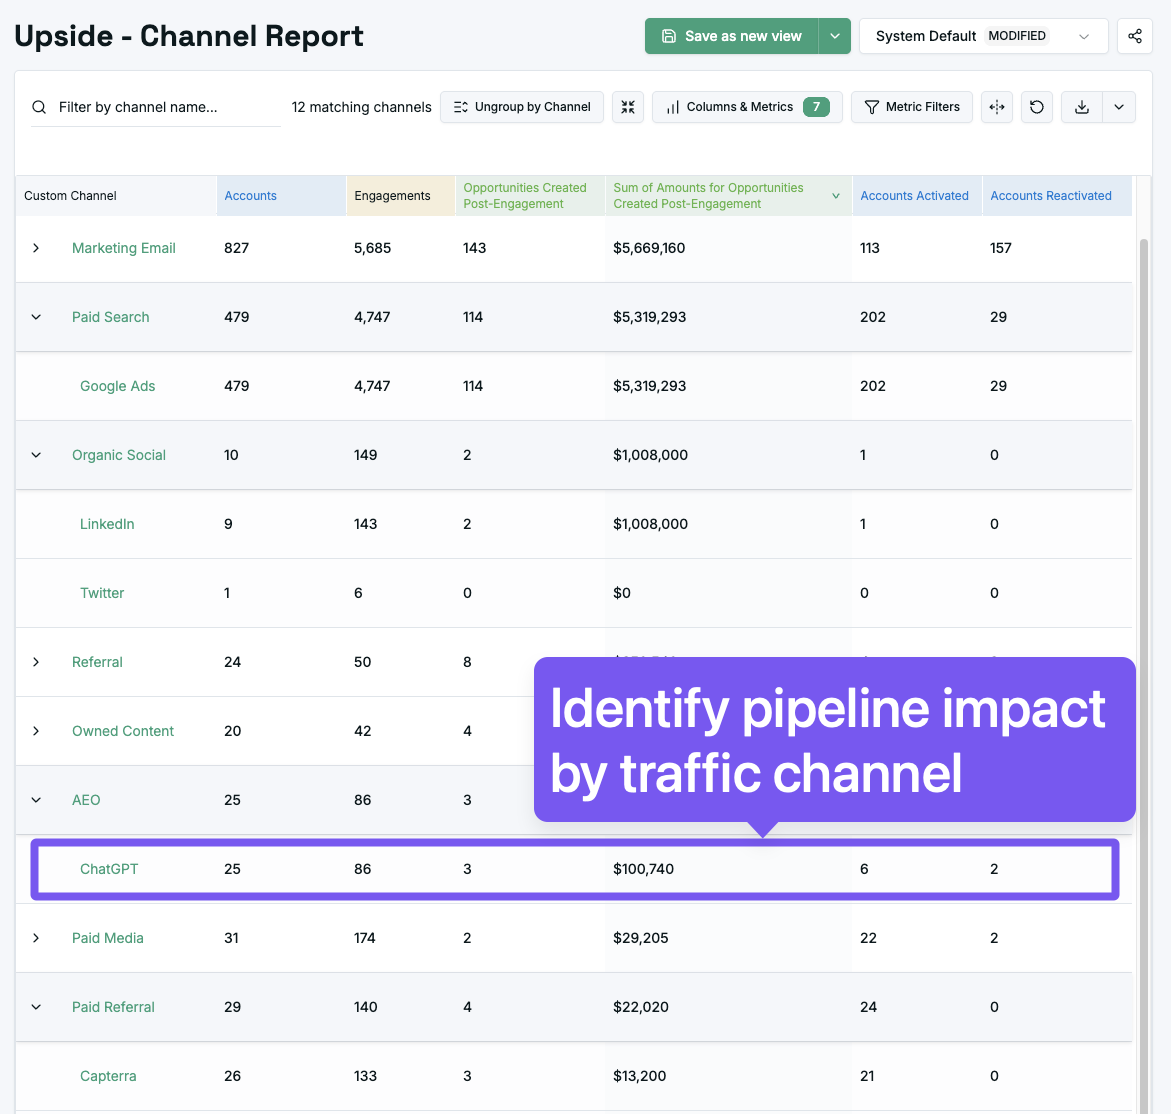
The result: clean, trustworthy attribution without spreadsheets, overwriting, or manual stitching. In the screenshot below, you can see how Upside can tie UTM-tagged traffic to sales opportunities based on engagement from members of the buying group. As new channels get released (such as ChatGPT citations tagging their traffic as utm_source=chatgpt.com, you can set up rules that retroactively classify the traffic into a custom-tracked channel.
Final words
Strong UTM conventions improve every downstream report and transform disordered data into clarity. If you’re investing in driving web traffic to your website, it’s best practice to be using them consistently.
They’re the first step toward understanding not just what got clicked, but what actually drove revenue.
When you’re ready to tie your existing UTM values into pipeline performance, we can show you how Upside does full-journey influence attribution leveraging the UTMs you already have!